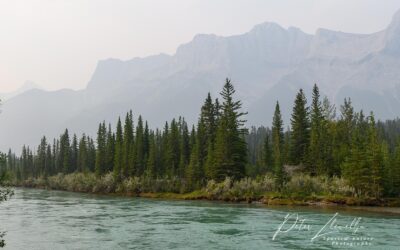
Several times I have been asked how it is that my long-time career as a sports photographer gels with the wildlife and nature work I now mostly shoot. The fact is that there are a great many similarities.
First let’s look at the equipment… Pretty much identical, rapid-focus cameras using large telephoto lenses.
Second… similar techniques, long periods of waiting around with not much happening while trying to maintain a high level of concentration so you don’t miss the decisive moment!
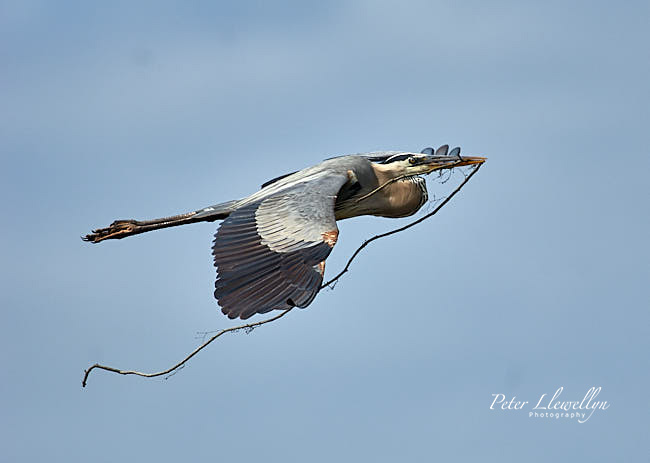
Great Blue Heron Ardea herodias bringing a stick to nesting mate Arthur R Marshall National Wildlife Reserve Loxahatchee Florida
Nikon D2x, 600mm f4 lens, mounted on a Gitzo tripod with Wimberley head, 1/3200th sec ISO 200 @ f5.6. You can certainly shoot low slowly flying birds from a tripod but it’s much harder to acquire focus and stay locked on than with hand holding. Here, as I was still shooting with a D2 series camera that does not handle high ISO settings as well as more modern cameras, I have opted for a larger aperture than I would choose today.
One area of wildlife photography where all the above is particularly true is in capturing images of birds in flight. Often fast moving, unpredictable, with difficult lighting, much the same as with so many sports events.
My preferred lens for in-flight photography is the Nikon 500mm f4, either with or without the TC-14 1.4x converter, and occasionally the 200-400 f4, more often than not hand held with image stabilization turned on, depending on the size of bird I am working with and the distances involved. I never use the converter on the 200-400, which slows down autofocus to an unacceptable level. This technique results in more ‘keepers’ than using the 600mm f4 on a tripod with a gimbal head. The 600mm is just way too heavy to hand hold, at least for me, not being a muscle-bound body builder!
Camera settings
Just like photographing high-speed sport it’s essential to set your camera effectively to freeze the action (unless of course you are going for intentional blur, but that’s a whole other subject – coming soon!) I never let my shutter speed drop below 1/2000th sec, adjusting my ISO settings to ensure that I stay at this speed or above. Remember, birds can be very high-speed subjects, often cruising at 30 mph, and can reach enormous speeds of 60 mph or more when diving or hunting. I will generally stop my lens down to around f8 to give a good depth of field and also because this is the ‘sweet spot’ on my 500mm producing the sharpest corner to corner images. Unlike sport and ground-based wildlife subjects – where I will often use my telephotos wide open (largest aperture) to limit depth of field and isolate my subject from the background – this is rarely necessary with in-flight photography as, in the majority of cases, your subject is against the sky or is already distanced from any discernible background.
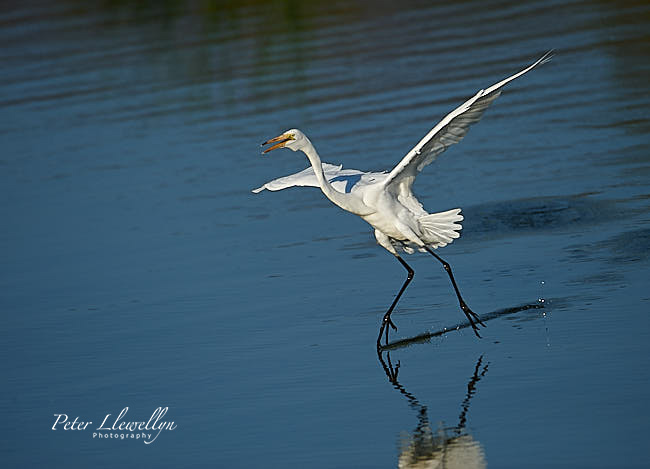
Great Egret (Ardea alba) in flight over Lake Chapala, Jocotopec, Jalisco, Mexico
Nikon D3s, 500mm f4 lens hand held, 1/2500th @ f8, ISO 800. Look for the unusual bit of action such as when this bird dips his toes into the lake..
With my Nikon bodies I use continuous autofocus, AF/C (AI Servo on Canon) and select 9-point autofocus when photographing single birds, or 51-point 3D-tracking when shooting more than a single bird. I always use the highest frame-per-second rate possible and, like capturing sporting action, will often shoot in short bursts.
Shooting birds in flight I almost always use manual exposure, unlike sport where my preferred method is aperture priority. Primarily, in sport, I generally aim to keep my subject isolated from the backgrounds which, most of the time, are fairly constantly lit. With in-flight photography, backgrounds can constantly change as you continue to shoot; i.e. the birds move from blue sky to white cloud, or from a dark vegetation background to a more open area, and it’s really important that the exposure is based on the bird and not on the background. To set my exposure I get in position and shoot a few test shots ensuring my minimum 1/2000th sec is achieved, checking my histogram, and adjusting my shutter speed and ISO to move the histogram to the right without it actually touching the right-hand edge and blowing out highlights. It is essential to keep detail in the brightest, often white, part of your subjects.
For white balance I invariably just leave the setting at auto. As I shoot 100% in RAW format, I can always change the white balance in post production, if I need to – which is rarely. I find it all too easy when manually setting a white balance to forget I’ve done so and end up with extra work on a whole bunch of photos.
Technique for birds in flight
Even though my Nikon lenses autofocus extremely rapidly, you often have little time to acquire sharp focus as a subject might suddenly appear. To ensure the most rapid focus I will, if at all possible, find a subject that is at approximately the same distance as I predict my subjects might appear and pre-focus on that. This means that when a bird appears in the right zone my lenses have little work to do in locking on to the bird and I find I am shooting sharp images way earlier. I always use the rear focus button on the camera and not the half-depressed shutter button, as I like to decide when the cameras actually focus on the subject… Another throwback to how I shoot sport.
If you can, keep your selected autofocus points on the eye of the bird, which is easier with large birds than with rapidly moving, smaller subjects. When photographing more than one in-flight bird, ensure that your focus points are on the leading bird, because if the leader is ‘soft’ and the following bird(s) is sharp, it produces a very strange look.
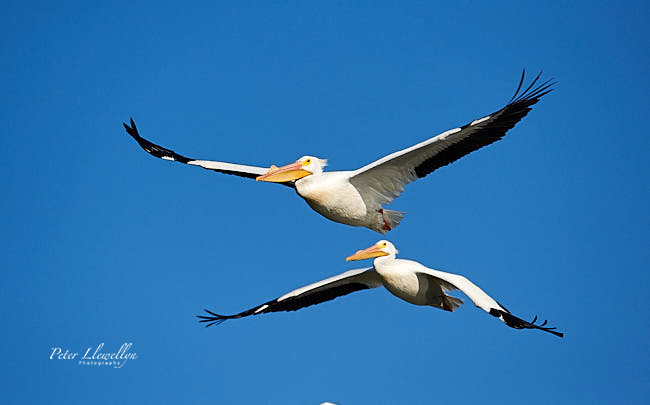
American White Pelican (Pelecanus erythrorhynchos) flying above of Lake Chapala, Jocotopec, Jalisco, Mexico
Nikon D3s, 500mm f4 lens handheld, 1/2000th @f8, ISO 320. When shooting more than one bird ensure you focus on the leading subject. Also remember that many birds have large areas of white colour so it is essential that you don’t blow out your highlights.
Just like shooting sports, with birds in flight it is essential to develop good panning technique. You MUST keep the lens moving, locking your subject in the same position in the viewfinder as far as you can, and keep shooting. A common error is to shoot every image with the bird dead centre in the frame. I often shift my focus selection points slightly to one side of the frame or the other depending on the flight direction, to allow space for the bird to move into. This generally gives a much more pleasing composition. The best bird images, particularly with larger species, tend to be when the wing is at the highest or lowest position during the flapping motion, aim to hit this spot consistently.
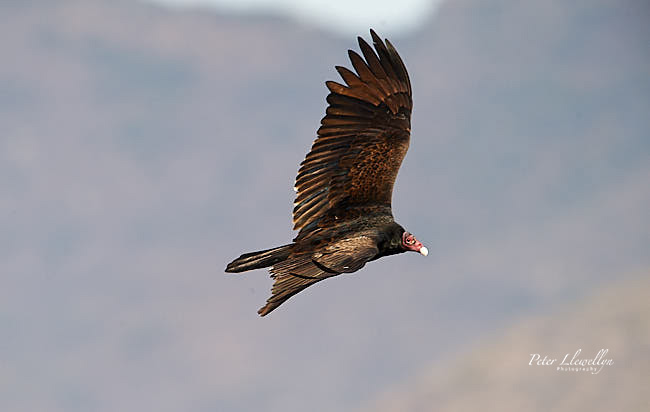
Turkey Vulture (Cathartes aura), in flight, Ajijic, Jalisco, Mexico
Nikon D3s, 500mm f4 lens with 1.4 teleconverter (effective focal length of 700mm) hand held, 1/2000th sec @ f8, ISO 1200. Try and time your shots so the wings are either fully elevated or fully down, relatively easy with soaring birds like this vulture
Perhaps more-so than with other forms of wildlife photography, it is practically essential to shoot with the sun at your back with a useable arc of around 30°. Backlit and sidelit subjects rarely work well as you will invariably end up with very harsh shadows. The angle of the sun is also a huge factor. Photographers talk about the golden hours, around two-and-a-half hours after sunrise and two hours before sunset, when the light has a soft even feel and has a golden glow that lends itself well to all wildlife subjects. A further advantage of a low sun angle is that it will often result in a great catchlight in a subject’s eye. In general, high sun angles during the middle part of the day are not workable if the sun is out, but you can extend the shooting day with more overcast conditions.
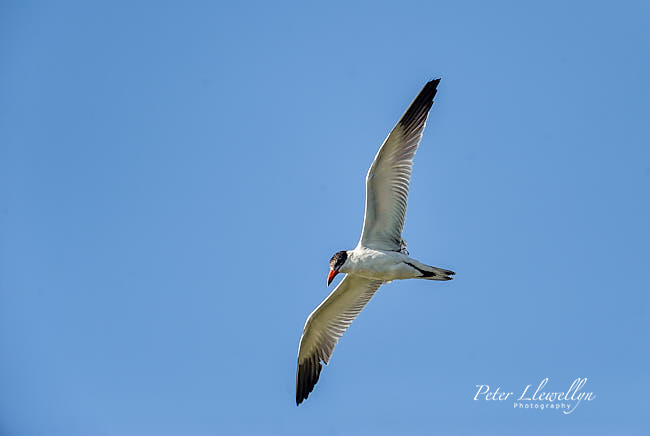
Caspian tern (Hydropogne casoia) flying above Lake Chapala, Jalisco, Mexico
Nikon D3s, 500mm f4 lens with 1.4 teleconverter (effective focal length of 700mm) hand held, 1/2500th sec @ f8, ISO 800. Give a little more space on the side of the image that your subject is facing to allow room for it to ‘move into’
Another weather condition to keep in mind is wind direction. Birds, like aircraft, will tend to take-off and land into the wind. Absolutely the best conditions for in-flight bird photography is when both the sun and the wind are at your back.
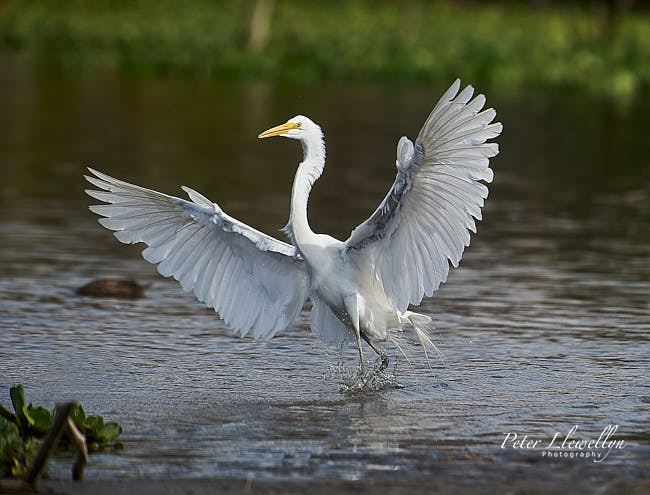
Great Egret (Ardea alba) landing on edge of Lake Chapala, Ajijic, Jalisco, Mexico
Nikon D3s, 500mm f4 lens with 1.4 teleconverter (effective focal length of 700mm) hand held, 1/1600th sec @ f8, ISO 800. Birds take-off and land into the wind, try and have both sun and wind at your back
Remember, like all photography, the foregoing suggestions are guidelines and not set-in-stone rules! I still experiment with different shutter speeds, camera movement, lighting angles etc. but, my experience has been, that using the above guidelines will generally produce the most pleasing images.
To see more flight photography go to the wildlife and nature galleries and choose Birds in flight or enter the keyword ‘flight’ in the Search box.


