As many of you that have followed my admittedly intermittent blog postings will know, I was extremely disappointed when Apple dropped development of their professional imaging program back in 2014, forcing a move to Adobe Lightroom. At the time there really was, in my humble opinion, no viable alternative. Te next blow was Adobe’ decision to move their products to a subscription based model, which I was somewhat opposed to having always owned my own software.
Now, Lightroom is a great program with a host of features but I never really liked three aspects:
- The RAW conversions from my Nikon cameras were never quite up my expectations
- I just did not like the interface, having to constantly switch modules depending on what I was wanting to do
- I had to keep all my images in one huge library as, to switch libraries, meant quitting and restarting
Over the past few years I have tried various options to try and help solve some of these issues, including
- Using Nikon’s own Capture NX2 software for RAW conversions – nice results mostly but way too slow when handling large volumes of images
- Investigating various databasing options but none really fit with my workflow, mainly because I didn’t want to add yet another layer to my workflow
- Trying just about every independent RAW converter on the market to see if there was one that met my requirements
There was one program that I kept coming back to each time a new iteration was announced, PhaseOne’s Capture One Pro.
Capture One Pro 8 – Great RAW conversions, but the catalog was soooo slow to open.
Capture One Pro 9 – Great RAW conversions, catalog marginally quicker but still not fast enough.
Capture one Pro 10 – Even better RAW conversions , and the catalog was now much quicker. I came within a whicker of taking the plunge and making the purchase, even building a complete catalog for my wildlife and nature images but the darned thing kept crashing. It just wasn’t stable enough.
Capture One 11 (Yes the Pro designation has gone from the name but what a Pro program this has turned out to be.) The best RAW conversions with the minimum of post processing work, rapid catalog opening with quick image searches and so many new features including the ability to add layer adjustments for just about every adjustment type available. Painting a layer adjustment mask, and refining the edges has become incredibly straightforward with the added advantage that all masks (you can add up to xx) can additionally have the opacity adjusted, a boon for fine control of each masks effect
In fact, Capture One 11 is worth the price (and yes, you can either buy it $x and own the software or opt for a monthly fee of $x) just for the amazing power of the layers.
Working in Capture One now provides me with a workflow that fits perfectly with the way I like to deal with my images.
- Download from the card into Photomechanic. Sort, delete outtakes, caption and keyword. (More on the way I do this in a future blog). After all images are ready they are moved onto the main images hard drive and at the same time renumbered to reflect my numbering system. Images are automatically backed up daily onto second and third mirrored drives.
- Images are imported into Capture One 11 ensuring that the check box for Exclude Duplicates is on and that files are left in their current location – i.e. the Main Images Hard Drive
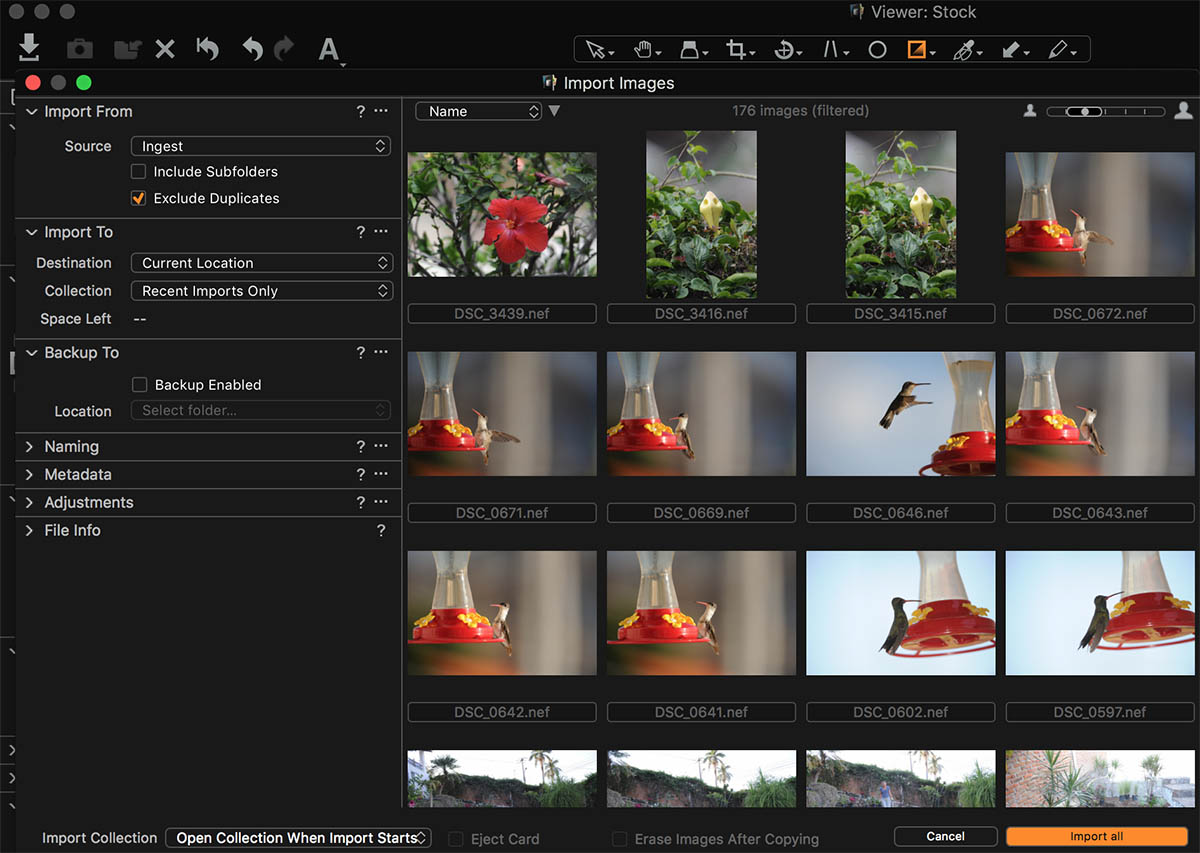
Import dialogue
- As images are already sorted and captioned I immediately start working on each image preparing it for it’s intended use – i.e. For publication, upload to my representing agencies prepared for the website etc – (more on outputting the images for final use later)
- All the preparation and outputting of images in Capture One 11 takes place within a single screen – just like Apple Aperture! No switching into different modules to perform each task
Although I state a single screen this is not strictly speaking true as I do have a dual screen setup and have saved a workspace in Capture One where I have all the thumbnails on one screen and the enlarged image where adjustments are made on the second.
You can create as many different workspaces as you wish so, for example, I have created spaces for working onsite on my laptop, as well as my dual monitor setup for the office.
Capture One Process
My process for working on images tends to follow pretty much the same pattern although of course refinements are made depending on the requirements of each image.
- I correct any overall colour casts or white balance anomalies using the colour balance and white balance tools
- I perform overall exposure adjustments first setting input and output levels then using the Exposure, Contrast, Brightness and Saturation sliders
- I open up or hold back shadows and highlights using the appropriate sliders
- I now start adding layer masks if necessary to make defined and targeted local adjustments. Remember I can add layer masks for any of the adjustment tools other than vignetting and the black and white conversion tool. Using layers in Capture One has been a revelation, and is perhaps, the main reason that few images go into Photoshop. Layer masks are incredibly easy and accurate to paint onto the image
- I clean up the image using the Spot Removal tool and Clone and Heal layers depending on needs
- I crop the image
- I apply sharpening as necessary sometimes to the whole image and sometimes to selected portions using another layer mask.
And so far my image has not, and probably won’t, ever be opened in Photoshop. However, note that it is entirely possible to ’round trip’ an image into Photoshop or other imaging programs such as the Nik collection and Capture One will automatically create a new version for the adjustments applied and re-import the resulant version back into the Capture One 11 catalog when yu save it.
Outputting Images
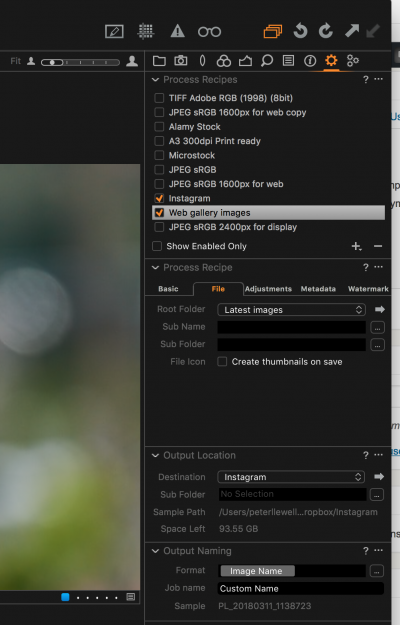
Output recipes – here I am simultaneously preparing images for my Instagram account and My website galleries
Finally the point of all this work is to prepare images for final use. In Lightroom I had to set up a series of output presets and re-process each image multiple times if it was to be used for several uses, i.e. web site, Instagram, and publication ready.
Thanks to Capture One’s ‘Process Recipes” I can set up the various parameters for each use, save those settings as a recipe, and select multiple recipes at the output stage and Capture One will within a few seconds process the same image multiple times for each use – a great timesaver.
Other features
There are many features of Capture One that I don’t use but that would still be of great value to other photographers. The two most notable are tethered shooting, for which, I, at the moment have little use and annotations which allow a photographer to add notes directly onto an image when sending it to another person, perhaps for further retouching etc.
What do I still use Photoshop for?
Well, actually very little!
Occasionally if I find that I have a lot of clean-up to do on an image due to excessive sensor dust I might take the image into PS as it is quicker and better at that .
If I am compositing images, using focus stacking techniques etc. then PS would be the tool for this, but, for straightforward, preparing images for publication than Capture One now does it all.
What do I miss from Lightroom?
Of course no program is perfect and there are a number of features I do miss from Lightroom.
Perhaps the biggest is that Capture One does not accept the use of any plugins. I have used plugins available for Lightroom to automatically send images to the agencies that handle my work and Lightroom records which images have been sent and even, with Alamy, records sales statistics for each image. I now have to output my agency images to a folder and upload using an FTP program rather than directly from the database.
To ensure I don’t send duplicates I now use the colour tags to record which images have been sent to each, not to mush of an onerous task.
DOWNLOAD A 30 DAY TRIAL OF CAPTURE ONE AND GIVE IT A TRY YOURSELF