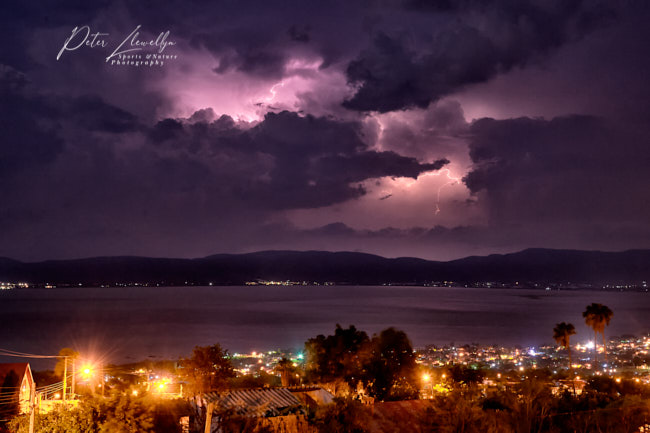
A couple of nights ago I was treated to a huge electrical storm over Lake Chapala, Mexico. No rain, no thunder, just lightning. This went on for well over an hour presenting a great opportunity to capture some dramatic lightning images.
Safety first
First however, a word of warning, if you are venturing out to shoot lightning pictures remember that lightning is dangerous. Stay inside a building or vehicle and definitely stay away from tall trees, water, and any other tall object that can act as a conductor. All the images in this article were taken from the covered deck of my home, around 600′ above the lake.
Equipment
To successfully shoot lightning images you need a camera that can be set to manual exposure, and a sturdy tripod and preferably a cable release. You are going to be using long shutter speeds so it is essential that there is no movement whatsoever of the camera. Lens choice will depend on the location of the storm but generally wider angle lenses will work best.
Nikon D3s, 24-70mm f2.8 lens @ 35mm, 10 sec at f8 set manually, Gitzo carbon fibre tripod with Arca Swiss ball head
Set up your camera and lens on the tripod and focus manually to infinity. It’s best to turn autofocus off so the lens does not hunt for a focus point in the dark. . You need to include some foreground elements to add interest and in the shot above I am fortunate to have the village of San Juan Cosala with it’s lights. This did however present a slightly tricky lighting balance as too long an exposure would simply blow out the lights of the village into one big glare.
You need to experiment with your exposures – the shutter needs to be open long enough to capture one of more bolts of lightning. Take lots of shots, some will work and some won’t and it is, to a great extent a matter of luck. Vary your exposures until you find one that works. Review images on the LCD screen as lightning varies tremendously in the level of brightness.
It is also, to some extent, possible to anticipate the next bolts of lightning as there are often fairly regular intervals between strikes. But, your shutter must already be open when lightning occurs, if you try and take the image as you see the lightning you will be too late.

Lightning storm at night over Lake Chapala looking toward Jocotopec village, Jalisco, Mexico (Peter Llewellyn)
Nikon D3s, 24-70mm f2.8 lens @ 48 mm, 3 sec at f2.8 set manually, ISO 200. Gitzo carbon fibre tripod with Arca Swiss ball head. This image shows both cloud to cloud lightning and bolt lightning
Noise reduction
Long exposures inevitably mean an increase in the noise in the image file. My Nikon camera have built-in processing for long exposure noise reduction. This captures a ‘dark frame’ using the same exposure as the original image immediately after the original is captures. The camera software then uses this dark frame to find and remove ‘hot pixels from the original. Very technical, but it works. If you have it turn it on! The downside is that if for example you are shooting a 30 second exposure the processing takes another 30 seconds during which you cannot take another image.
In addition to the above I also process long exposure images through NIK filters Dfine which further reduces noise. (See NIK filters are back in business)

Lightning storm over lightpainted palm trees, Matehuala, San Luis Potosí, Mexico.
Nikon D3s, 24-70mm f2.8 lens @ 24 mm, 30 sec at f11, set manually ISO 160. Gitzo carbon fibre tripod with Arca Swiss ball head. This image shows both cloud to cloud lightning and bolt lightning
In the above image I have used a 2 million candlepower flashlight to ‘paint’ the trees and add interest to the foreground, around 15 seconds of paining on each tree.
To view more weather related images enter keywords in the search box below


