feeding at a Hosta flower")
Since being back in British Columbia we have had our hummingbird feeders out and have seen more of these mini wonders than in any previous year. We have been filling the feeders every day and if we are a little late the birds soon mob us as soon as we go outside and let us know.
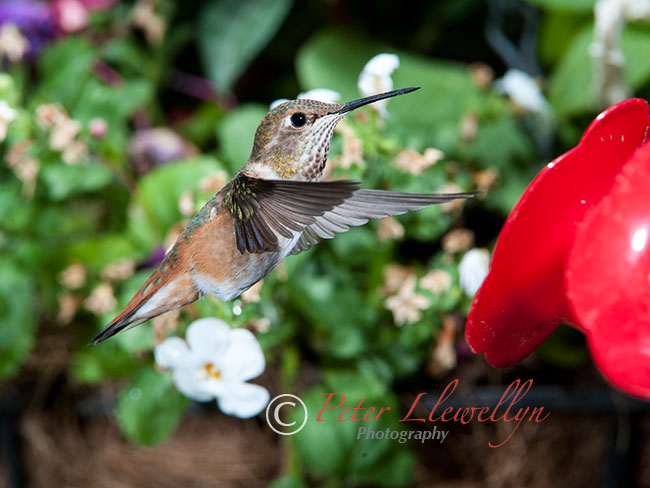
Female Rufous Hummingbird (Selasphorus rufus) in flight at a feeder
One feeder is situated on our upstairs deck, overlooking the garden and this is jealously guarded by one male Rudous Hummingbird who sits nearby waiting for intruders. As soon as another hummer appears anywhere near the feeder he rockets across the garden and there ensues a round of astonishing aerial combat – this is ‘Atilla the Hum’ who terrorises the rest of the hummingbird flock. However as soon as he is otherwise engaged other birds will rapidly take the opportunity to visit the feeder.
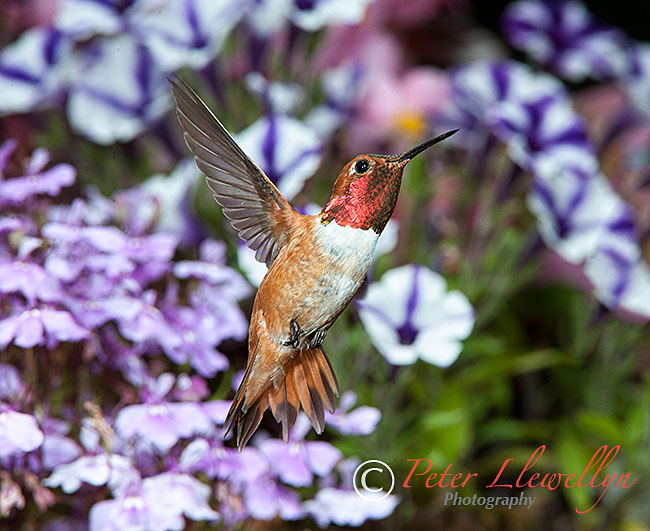
Atilla the Hum – Male Rufous Hummingbird
Photographing hummingbirds can be a little challenging – their wings beat at some 60-70 times per second, and can fly at 25-30 mph in normal flight and attain 60 mph when they make their spectacular dives. Fortunately they are also able to hover virtually motionless when feeding and are the only bird that can fly backwards.
Even with today’s modern DSLR’s and their ability to shoot at shutter speeds of up to 1/8000th sec this will still not be fast enough to get those wings completely frozen. In addition to obtain these fast shutter speeds you will often need to dial up the iSO setting resulting in loss of image quality, and open up the lens to it’s maximum aperture resulting in limited depth of field. The answer is to use high speed flash to freeze the action.
My technique for high speed flash
There are number of ways to set up for high speed flash, but here is my method. (When I talk about high speed flash I am using regular camera speedlights, not studio strobes)
Flash settings
I set all my flashes to manual. Some photographers use TTL but I find that for this sort of work I prefer to have complete manual control. The main reason for this is that flash is providing 100% of the illumination for the photograph, therefore, once you have your camera and flash settings giving a correct exposure, you are not subject to any changing light conditions so you can be guaranteed that every exposure will be the same.
Flash duration is directly related to the output setting on the flash. The table below gives the power output and corresponding flash duration for settings with a Nikon SB910 Speedlight. Other Speedlights will be broadly similar including those by other manufacturers.
1/1 (full) output = 1/880 sec
1/2 output = 1/1100 sec
1/4 output 1/2550 sec
1/8 output = 1/5000 sec
1/16 output = 1/10000 sec
1/32 output = 1/20000 sec
1/64 output = 1/35700 sec
1/128 output = 1/38500 sec
As you can see, when you dial down the power, the flash duration gets progressively shorter, and these durations are way faster than any camera shutter. So how to put this to good use.
Camera settings
I also set my camera to manual mode when using high speed flash. Again, once you have a correct exposure there is nothing to change and you need to gain complete control for this first stage.
You need to determine a base exposure – this is an exposure at which the camera will register no ambient light in the image. (To help with cutting out ambient light it is helpful if your subject area i.e. the feeder and background are in a shady area rather than full sun). Start by setting your camera to it’s lowest ISO setting, which will additionally give the best quality in your file and the fastest flash synchronization speed. (Nikon and Canon users should not use high speed flash settings as, to achieve these fast synchronization speeds, the flash emits multiple burst of light that will have a slightly stroboscopic effect and result in blurring of the wings – the very thing we are seeking to avoid). Turn off your flashes, focus on the feeder and take images adjusting your camera aperture until you get a completely black frame, i.e. no image registering at all. I generally find something in the order of ISO 200, Shutter speed 250th (my fastest sychronization speed) and an aperture of around f11 does the trick in a shady location.
With regard to lenses you need something that focusses relatively closely whilst allowing you to remain far enough form the feeder to not disturb the birds. Something in the 300mm to 400mm range is ideal. I pretty much always use my 200-400mm f4 for these shoots as it focusses right down to 2m (6.2′) allowing frame filling shots of these tiny birds.
Finally – use a tripod! You cannot possible hand hold a long lens, focus and frame the birds with any degree of accuracy.
Placement of the flashes
Note that I say flashes – you need more than one flash for a number of reasons. First, the output is going to be dialled right down so output is going to be low (although we are going to compensate by placing the flashes close to the subject area). Second we need to light from multiple directions to avoid shadows, and third we are going to need to light the background otherwise it will register as jet black (although this in itself can lead to interesting photographs).
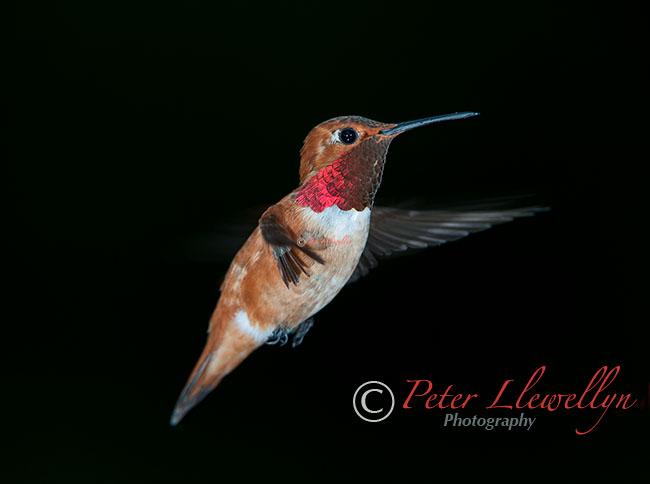
Rufous Hummingbird (Selasphorus rufus) in flight – no background
Many articles will show setups with between five and seven flash heads but you can certainly get great photos with as few as three as I will demonstrate. (Note that because you are using fully manual settings you do not need thousands of dollars worth of camera brand flashes – a few cheaper models with manual settings will easily suffice such as those made by Vivitar and others).
Your flashes do need to be close to the subject area as your flash output is going to be low and will not have a lot of reach, around 12″ to 18″. To use a three light set up I place two of the flashes at around 45º with one set slightly higher than the other to give a balanced light, and a third above the background pointing straight down.
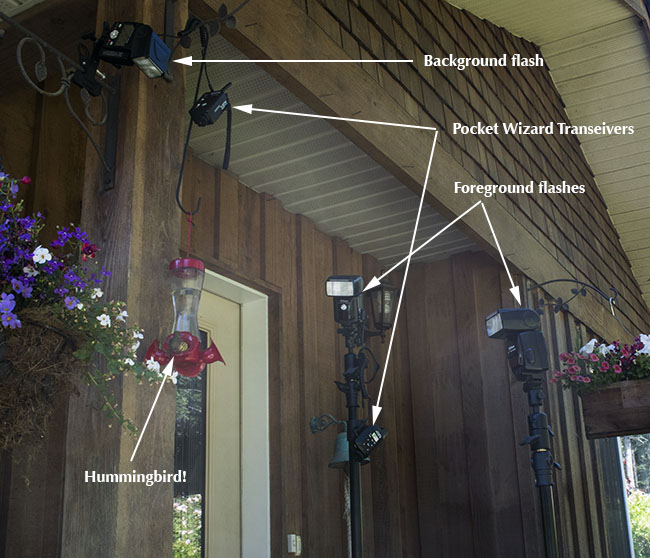
Set up using three flash heads
Most modern flashes also have a zoom setting. I set the two flashes in front of the subject to their maximum zoom settings to concentrate the throw of light and the background flash to 50mm to give a bit of spread over the background.
I generally start with an output setting of 1/32 or 1/64th, either of which will give an action freezing flash duration for a hummingbird wing. Take a photo, doesn’t have to have a bird in it, simple image of feeder or a flower head in the correct location will do just fine. Check the exposure on the camera and watch for flashing highlights and blown out area on your histogram. Adjust your camera aperture (never the shutter speed) until you have a spot on exposure.
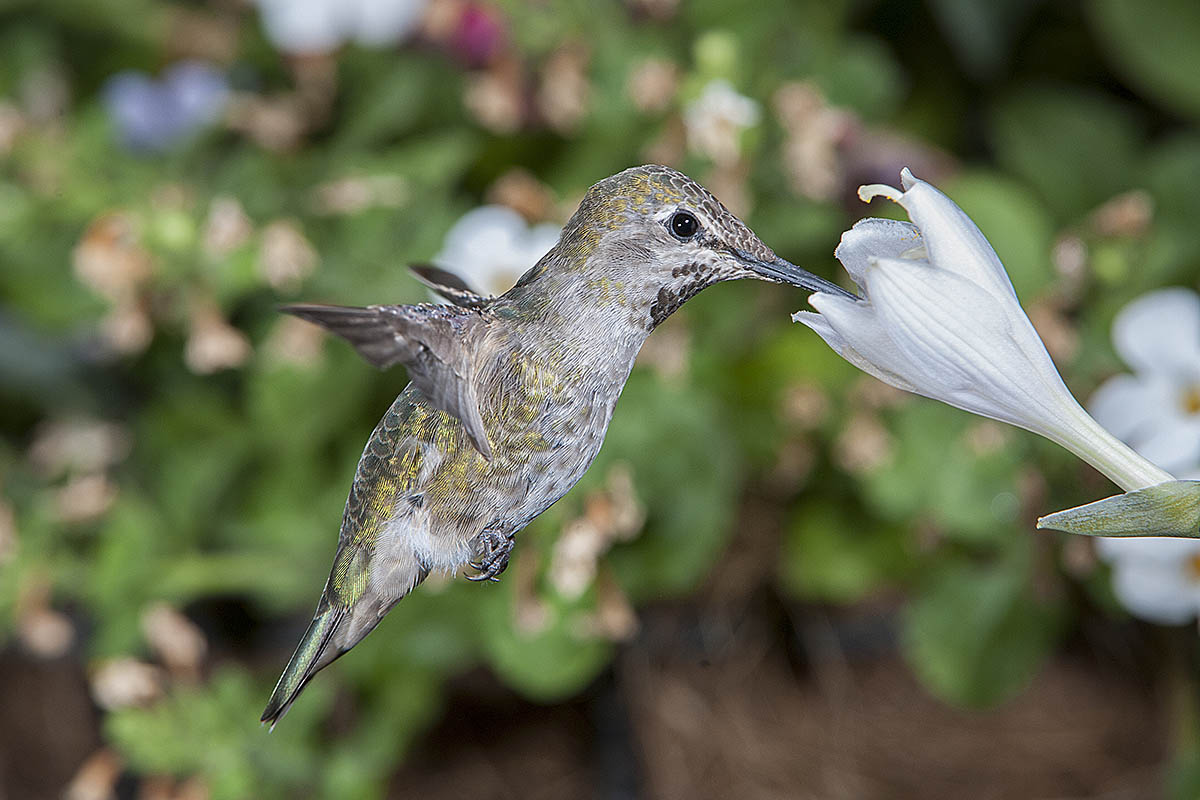
Female Anna’s Hummingbird (Calypte anna) feeding at a Hosta flower
You are going to need a method of firing the flashes. I use Pocket Wizard Radios along with some flashes set to fire using IR slave. You can also use a sych. cord to one flash and set others to fire using either built in optical slaves or cheap add on optical triggers. Check your manuals to see what works for you.
Feeder set up
To attract the birds it’s best to set up at a feeder station they have already been habituated too. Hummingbirds are remarkably tolerant, allowing you to be very close whilst they feed. When you start shooting don’t simply fire away every time a bird arrives at the feeding station. Give them a break once in a while and allow them to feed without the flashes popping of every time they get near. It is amazing at how quickly they will get used to the flashes and other ‘stuff’ you have placed near their feeder.
Start by placing the feeder to one side of the frame. Cover any feeder holes you don’t want them to visit. If your feeder has perches remove them as the hummingbirds will provide better subject material as they hover rather than sat on a plastic feeder.
Once the birds are habituated you can start changing things up. I usually start by placing suitable flowers close to the feeder which can give the illusion of the birds feeding on the flowers. (Make sure you only use flower heads that the hummingbirds would normally visit to avoid a false looking image). The ideal way to position your blooms is to use a Wimberley Plamp. (http://www.tripodhead.com/products/plamp-main.cfm) The next step is to remove the feeder completely and replace it with a suitable tubular shaped bloom. Grab a syringe (I have often been described as a photo junkie!) and some sugar water and ‘inject’ the flower bloom with sugar water. They may be confused for the few few visits but will soon latch on to the idea that the bloom is fill of nectar. Regularly re-fill the bloom to keep them coming.
Sit back and wait for the hummers to arrive and make great images.
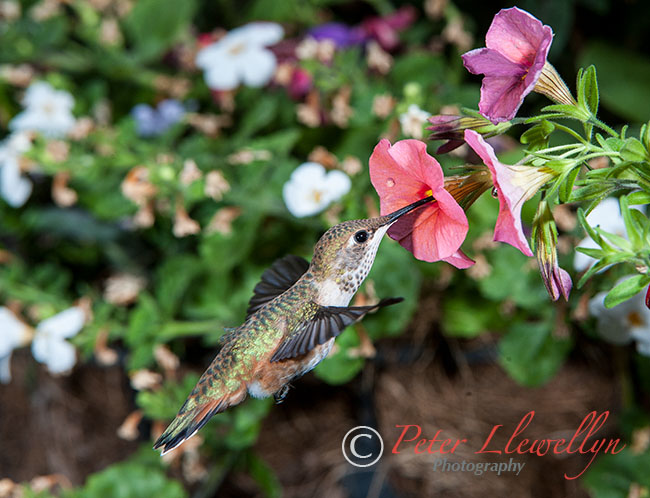
Female Rufous Hummingbird (Selasphorus rufus) feeding at a Petunia flower